


Sphinx の公式の通り「Sphinx は知的で美しいドキュメントを簡単に作れるようにするツール」です。本記事を最後まで読むと、Python に Google style で記述したコメントから検索・ページング機能付きの Html ドキュメントが生成出来るようになります。
Chromebook でも動作します。
'''
ファイルヘッダー
'''
class TestClass:
    """
    クラスヘッダー
    """
    def testfunc(self, x, y):
        """
        ファンクションヘッダー

        Args:
            x (int): 1st argument
            y (int): 2nd argument

        Returns:
            int: sum result

        Examples:
            >>> print(testfunc(2,5))
            7

        Note:
            注意事項などを記載
        """
        return x + y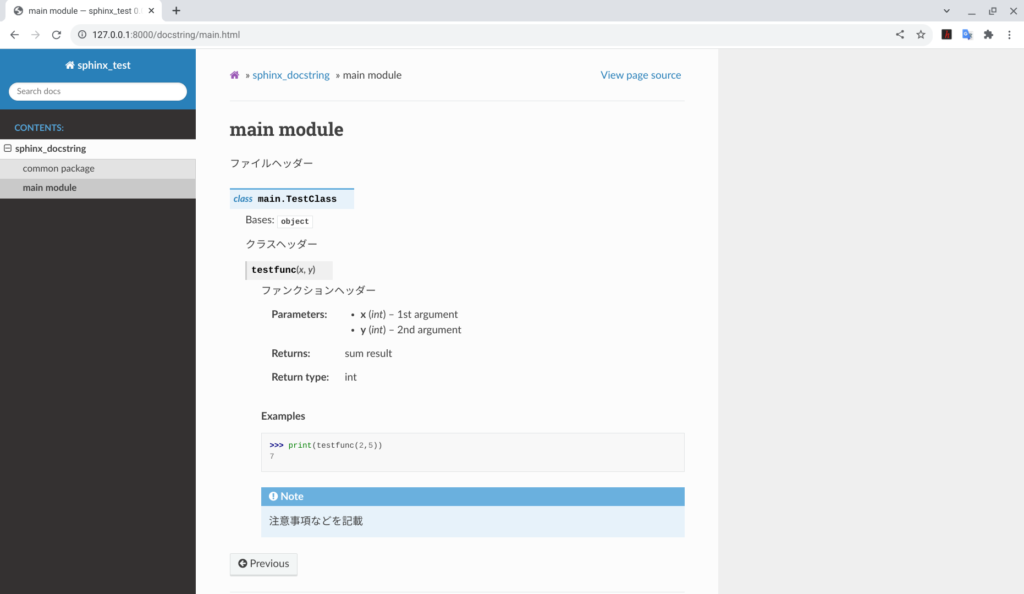
目次
サンプルコード実行準備
Python 仮想環境を構築
Sphinx のサンプルコードを動作させるために Python 仮想環境を構築します。
サンプルコードのクローン
GitHub から Shpinx テストサンプルをクローンし、VS Code で開きます。
※ zip でダウンロードしても可
必要ライブラリのインストール
VS Code よりターミナルを起動し、下記コマンドを実行します。
pip3 install --upgrade pip
pip3 install -U pip setuptools
pip3 install wheel
pip3 install -r requirements.txt
sphinx
sphinx_rtd_theme
sphinx-autobuildサンプルコードの実行
Sphinx プロジェクトの作成と Htmlドキュメントのビルド方法
Sphinx プロジェクト作成
下記コマンドを実行して Sphinx プロジェクトを作成します。
sphinx-quickstart docs上記コマンドを実行すると5回入力が求められます。下記を参考にして下さい。
※ ②〜④についてはコマンド実行後に作成される conf.py にて修正可能です。
① Separate source and build directories (y/n) [n]: → ” ‘y’ を入力しエンターキーを押下します”
② Project name: → “プロジェクト名を入力します 例)sphinx_test”
③ Author name(s): → “著者を入力します 例)kewton”
④ Project release []: → “リリースバージョンを入力します 例)0.0.1”
⑤ Project language [en]: → “何も入力せずそのままエンターキー押下します”
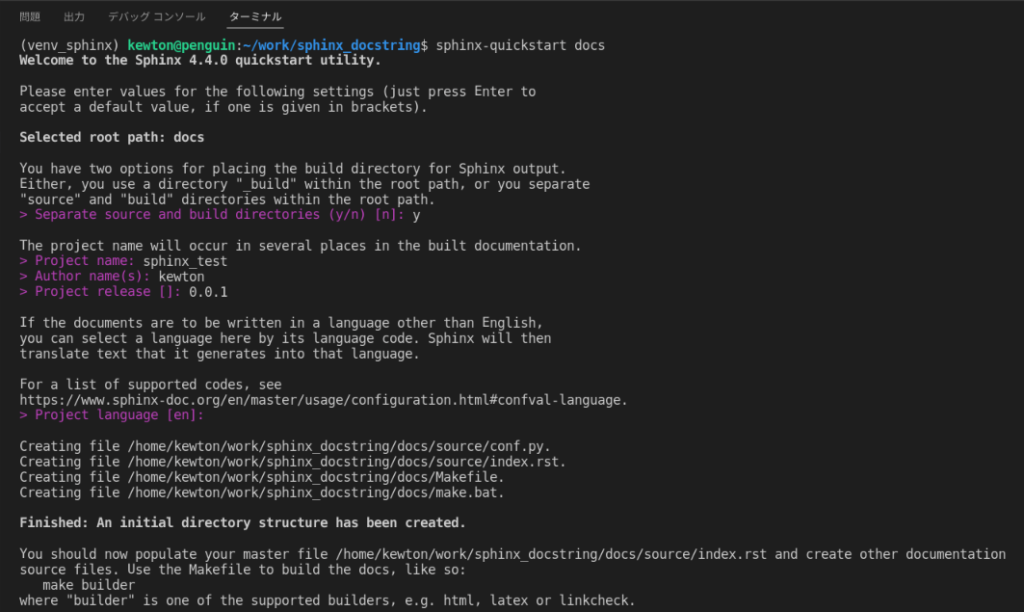
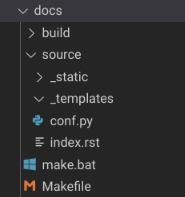
コマンド実行後、docs フォルダが作成されます。
※ build, _static, _templates はいずれも空のフォルダです。
Html ドキュメントのビルド
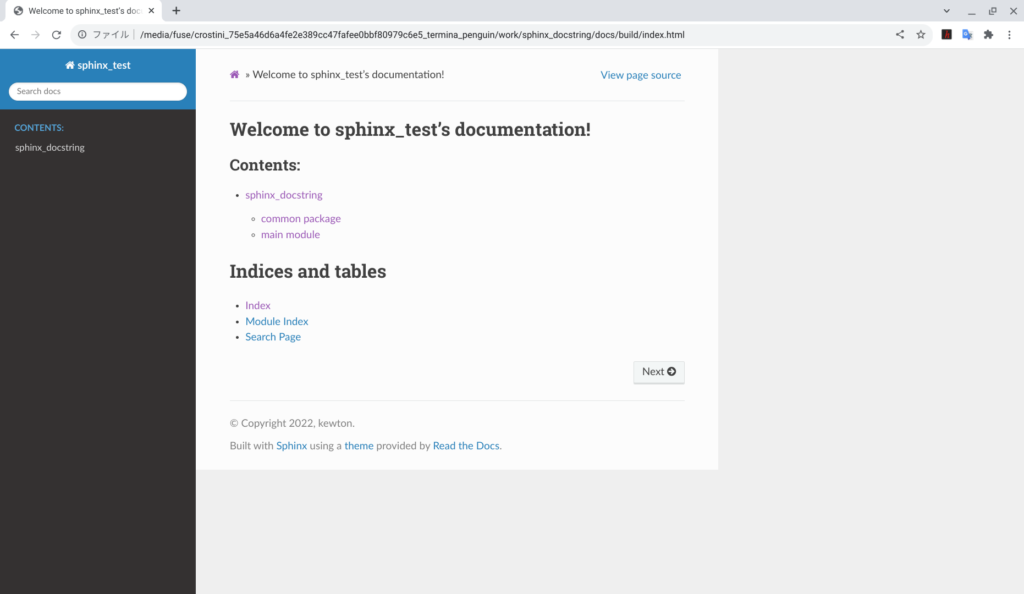
プロジェクト作成直後の状態でビルドして Html ドキュメントを作成します。
sphinx-build -b html ./docs/source ./docs/build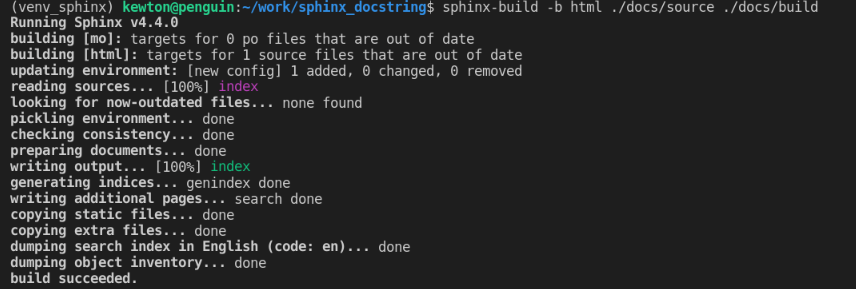
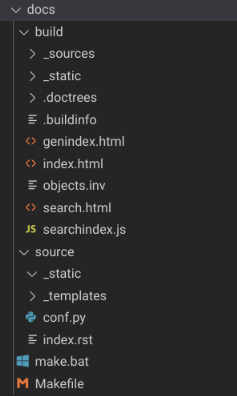
build フォルダ配下に html ファイルが作成されます。
index.html を実行します。下記の通り、Html ドキュメントが作成されます。

テーマ(html_theme)の変更
Web ページが作成されましたが若干シンプルすぎるので見た目をもう少しリッチにします。
source フォルダ配下の conf.py を編集して Webページのテーマを変更します。

50行目付近の html_theme への設定値を変更します。
# -- Options for HTML output -------------------------------------------------

# The theme to use for HTML and HTML Help pages.  See the documentation for
# a list of builtin themes.
#
# 変更前
# html_theme = 'alabaster'
# ↓
# 変更後
html_theme = 'sphinx_rtd_theme'
再度ビルドして index.html を実行します。Web ページのテーマが変わったことが解ります。

Python ファイルから Html ドキュメントを作成
Pythonファイル格納パスの追加
conf.py から Pythonファイルが参照出来るように sys.path を追加します。
conf.py の 13〜15 行目のコメントアウトを外して修正します。
# -- Path setup --------------------------------------------------------------

# If extensions (or modules to document with autodoc) are in another directory,
# add these directories to sys.path here. If the directory is relative to the
# documentation root, use os.path.abspath to make it absolute, like shown here.
#
# import os
# import sys
# sys.path.insert(0, os.path.abspath('.'))
import os
import sys
sys.path.insert(0, os.path.abspath('../../'))
拡張機能の追加
Python ファイルからドキュメントを取り込むために2つの拡張機能を有効にします。
sphinx.ext.autodoc
sphinx.ext.napoleon
# -- General configuration ---------------------------------------------------

# Add any Sphinx extension module names here, as strings. They can be
# extensions coming with Sphinx (named 'sphinx.ext.*') or your custom
# ones.
# 変更前
# extensions = []
# ↓
#  変更後
extensions = [
    'sphinx.ext.autodoc',
    'sphinx.ext.napoleon'
    ]
Python の docstring から rst ファイルを生成
下記コマンドを実行します。
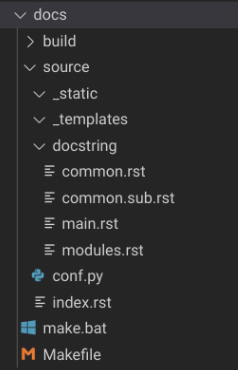
sphinx-apidoc -f -o ./docs/source/docstring .source フォルダ配下に docstring フォルダが作成され、その直下に各モジュールの rst ファイルと 各rst ファイルへの参照が記述された modeules.rst が作成されます。
sphinx_docstring
================

.. toctree::
   :maxdepth: 4

   common
   main
.. toctree::
:maxdepth: 2
:caption: Contents:
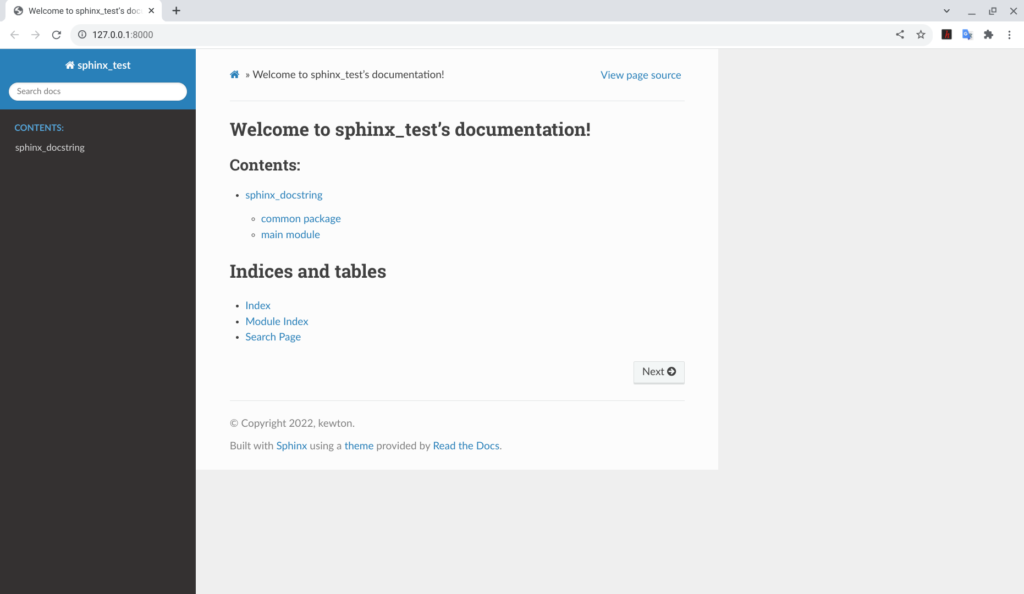
docstring/modules再度ビルドして index.html を実行します。
Web ページに各モジュールについての記述の参照が追加されたのが解ります。
http://127.0.0.1:8000 にホスティング
これまではhtmlファイルを直接実行してましたが、ブラウザからURL(http://127.0.0.1:8000)を指定して起動することも出来ます。
下記コードを実行します。
sphinx-autobuild ./docs/source ./docs/build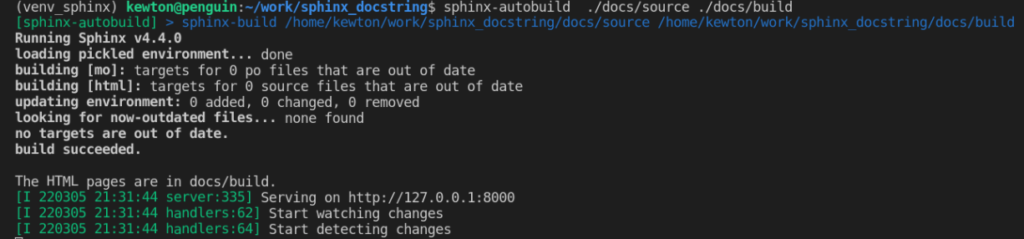
ブラウザから 「http://127.0.0.1:8000」を指定して先程の Html ドキュメントが起動出来ます。
サンプルコード実行イメージ
下記ファイルが
'''
ファイルヘッダー
'''
class TestClass:
    """
    クラスヘッダー
    """
    def testfunc(self, x, y):
        """
        ファンクションヘッダー

        Args:
            x (int): 1st argument
            y (int): 2nd argument

        Returns:
            int: sum result

        Examples:
            >>> print(testfunc(2,5))
            7

        Note:
            注意事項などを記載
        """
        return x + y
↓のように表示されます

Google style で記述したコメントが Html ドキュメント化されていることが解ります。
まとめ
本記事では、Sphinx を使用して docstring から Html ドキュメントを半自動で作成する方法を紹介しました。ご参考になりましたらtwitterをフォローしてSNSでシェアして頂ければ幸いです。
次回は、rst (reStructuredText) で記述されたドキュメントから Html ドキュメントをを作成する方法を紹介します。
ご参考
ちなみに今回は下記 Chromebook を使用しました。
14.0型フルHD × Core i3 × メモリ8GB を満たす数少ない端末です。
軽くて持ち運びしやすく開発に耐えうるスペックなのでおすすめです。
 | 価格:70,510円 |
Chromebook でプログラミングを始める方法については下記記事をご参考下さい。
IT・プログラミングに関する相談・依頼はこちら